Download our tutorials as print-ready PDFs! Learning Photoshop has never been easier!
Here’s a photo that suffers from a couple of distracting elements,
especially the large wooden post blocking the view of the mountains
above the Visitor Center sign: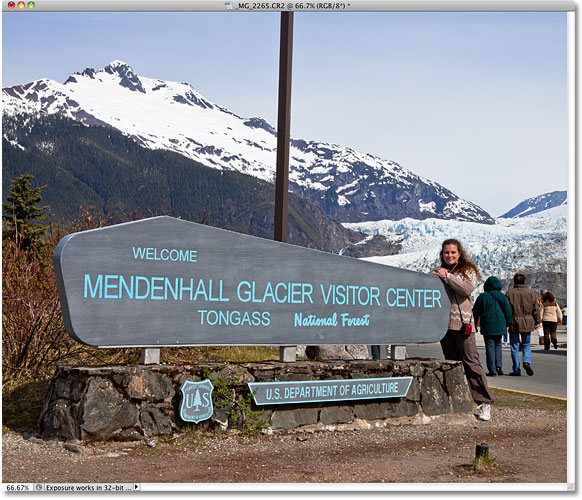
A nice view of the mountain. Too bad that post is in the way.
The traditional way to remove the post would be with the Clone Stamp
Tool, but let’s see if the new Content-Aware Fill option in Photoshop
CS5 can make the job easier for us. As always, I’ll first press Ctrl+J (Win) / Command+J
(Mac) on my keyboard to create a copy of my image so I’m not making any
changes to the original. If we look in the Layers panel, we see that I
now have two layers, each containing the same image. The original photo
will remain safe on the Background layer, and all of the editing work
I’m about to do will be done to the copy of the image on Layer 1 above
it: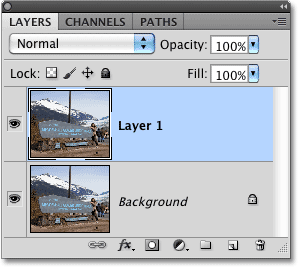
Working on a copy of the image to protect the original.
Since “Layer 1″ isn’t very descriptive, I’ll double-click directly on
the layer’s name in the Layers panel and change it to “content-aware
fill”, pressing Enter (Win) / Return (Mac) when I’m done to accept the name change: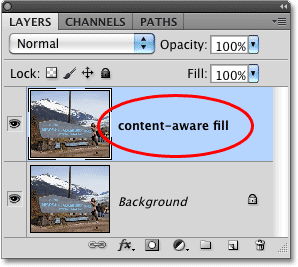
Renaming the layer to keep things organized.
To use Content-Aware Fill, we first need to draw a selection around
the object or area we want to remove or replace. Since the post is a
simple, straight-sided shape, I’ll use the Polygonal Lasso Tool, which is hiding behind the standard Lasso Tool
in the Tools panel. To access it, I’ll click and hold on the Lasso Tool
until the fly-out menu appears, then I’ll select the Polygonal Lasso
Tool from the list: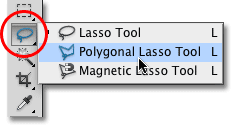
The Polygonal Lasso Tool is still hiding behind the standard Lasso Tool in Photoshop CS5.
With the Polygonal Lasso Tool selected, I’ll press the letter F
on my keyboard to switch out of the document window and into full
screen mode, which will make it easier to select the top of the post.
Then I’ll just click my way around the post to select it. You’ll want to
stay close to the edges of the object you’re selecting for
Content-Aware Fill to work best, but there’s no need to be surgically
precise: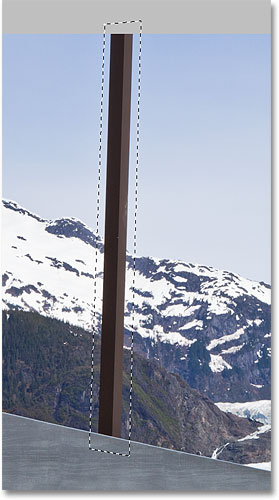
A selection outline now appears around the post.
With the selection in place, I’ll go up to the Edit menu at the top of the screen and choose the Fill command: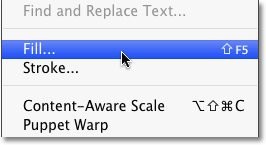
Choosing the Fill command from the Edit menu.
Just as Content-Aware Healing is a new option for the Spot Healing
Brush in Photoshop CS5, Content-Aware Fill is a new option in the Fill
dialog box. We select it by choosing Content-Aware in the Contents section at the top: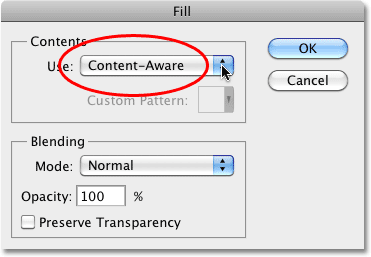
Photoshop CS5 now gives us a Content-Aware option in the Fill dialog box.
In Photoshop CS4 or earlier, all we could fill a selection with was a
solid color or pattern, but with Content-Aware selected in CS5,
Photoshop can now examine the contents of the image and try to fill in
the selected area with actual image detail, as if the object we’re
removing never existed! At least, that’s the idea of it. Let’s see what
happens when I click OK to exit out of the Fill dialog box: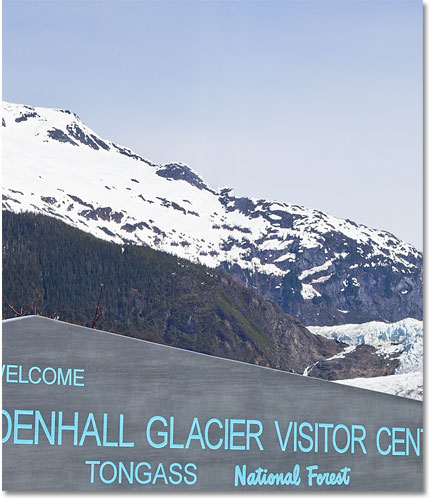
Content-Aware Fill was able to easily remove the post from the photo.
Just like that, the post is gone! Photoshop CS5 did an outstanding
job of removing it and filling the area with image detail as if the post
had never been there, and all I had to do was draw a selection around
it and choose Content-Aware from the Fill dialog box. Is it 100%
perfect? Not quite. The top of the mountain looks a little strange, and a
couple of areas look like a repeating pattern, but what we’re left with
now is nothing more than a quick clean up with the standard Healing
Brush or the Clone Stamp Tool rather than having to put in a lot more
time and effort by doing it all ourselves.There’s another distracting object of some sort in the bottom right corner of the photo that I’d like to remove, so I’ll use the standard Lasso Tool this time to draw a quick selection around it:
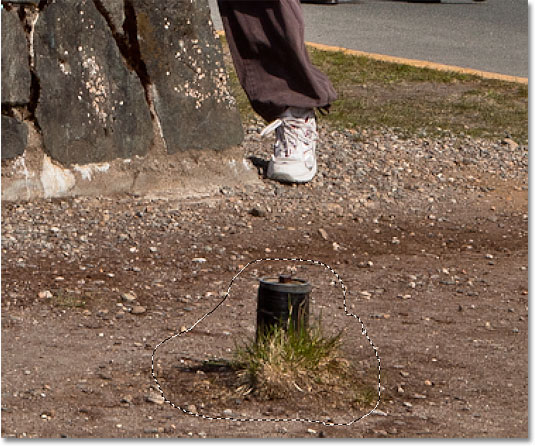
Drawing a selection around the object with the Lasso Tool.
With the object selected, I’ll go back up to the Edit menu and once again choose the Fill command. When the Fill dialog box appears, I’ll again choose the new Content-Aware
option. Finally, I’ll click OK to exit out of the dialog box, and
Photoshop CS5 does another great job at removing the object from the
photo, filling the area with new image data: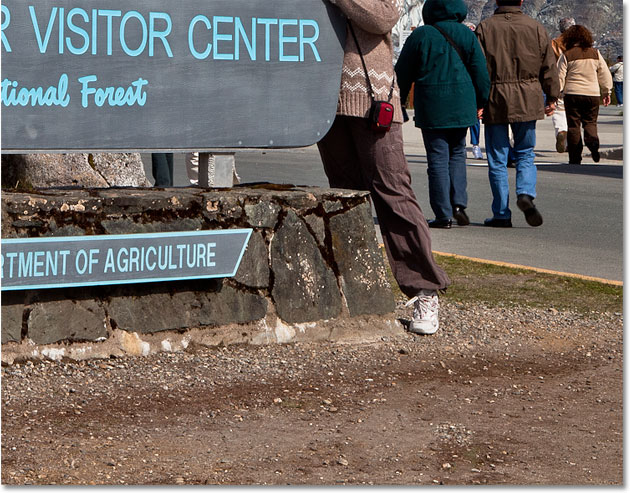
Another distracting object removed with almost no effort.
If you don’t like the results after running Content-Aware Fill, simply undo it by pressing Ctrl+Z (Win) / Command+Z (Mac), then running it again. You’ll get a different result each time.Back in a previous tutorial, we looked at how to stitch multiple photos together to create a panoramic image using the Photomerge command in Photoshop CS4. We won’t get into details here on how to create panoramic images since we covered it in the other tutorial, but if you’ve used Photomerge before, you’ll be familiar with the problem seen in the image below.
This is the panorama I created in the tutorial as it appeared right after running the Photomerge command, which left me with lots of empty blank space around the image:
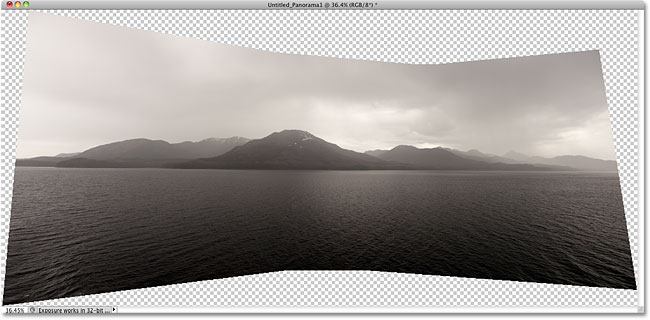
Photomerge is great at stitching images together, but it leaves lots of blank space around the result.
Normally (as in prior to Photoshop CS5), we’d get rid of all that
blank space by simply cropping it away with the Crop Tool, but let’s see
what happens when we let Photoshop try to replace the blank areas with
actual image detail using Content-Aware Fill.I’ve gone ahead and merged all of the layers onto a single layer, and I’ll quickly select the image by holding down my Ctrl (Win) / Command (Mac) key and clicking directly on the preview thumbnail in the Layers panel:
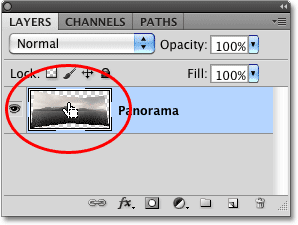
Holding Ctrl (Win) / Command (Mac) and clicking on the preview thumbnail.
As soon as I click on the thumbnail, a selection outline appears around the image: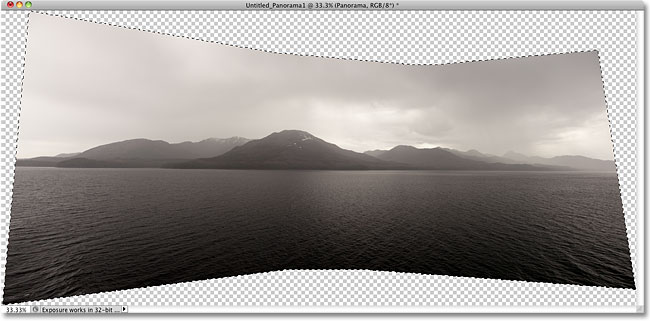
The image is now selected. The blank areas are not.
At the moment, the image is selected, but I don’t want to fill the
image with anything. I want to fill the blank space around it, so I need
to invert my selection, which will select the blank areas and deselect
the image. To do that, I could go up to the Select menu at the top of the screen and choose Inverse, but I’ll use the faster keyboard shortcut Shift+Ctrl+I (Win) / Shift+Command+I (Mac):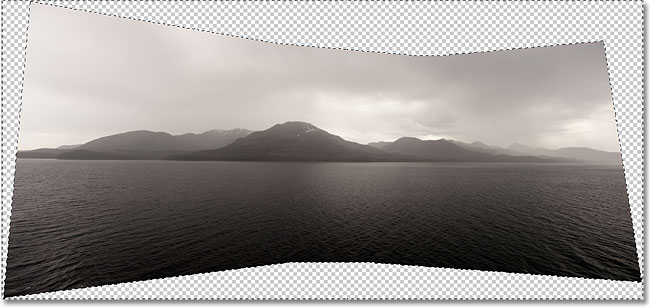
The blank areas are now selected. The image is not.
With the blank area now selected, I’ll go up to the Edit menu and choose Fill, just as I did before, and I’ll select the new Content-Aware option at the top:
Selecting Content-Aware in the Fill dialog box.
I’ll click OK to exit out of the dialog box, and after waiting a few
moments for Photoshop to analyze the image, we get the results. I’ll
press Ctrl+D (Win) / Command+D (Mac) to remove the selection outline so we can see the image better: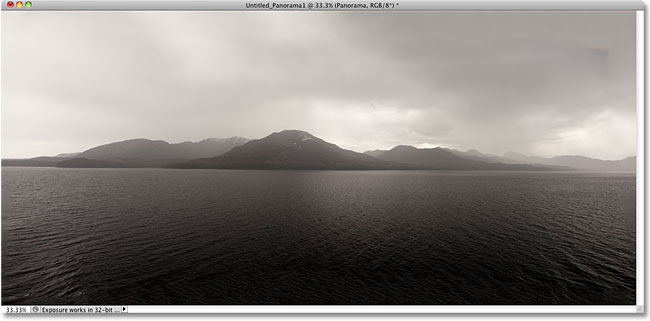
Content-Aware Fill was able to extend the image into the blank area.
Does Photoshop CS5 have some serious wow factor going on? I would say
so. Again, the results aren’t perfect. There’s an obvious dark blotch
in the clouds in the top right corner of the image and some of the water
along the far left and right edges appears blurry, but Content-Aware
Fill was able to do 80-90% of the work for me in a matter of seconds,
leaving me with nothing more than a quick clean up with one of the other
retouching tools. I’d call that impressive!As we’ve seen, Content-Aware Healing and Content-Aware Fill are great new additions in Photoshop CS5, but they’re certainly not the only new features. More are on the way!
http://www.photoshopessentials.com/photo-editing/content-aware-fill-cs5/
Tidak ada komentar:
Posting Komentar
terima kasih